Decorating a cake with whipped cream is a classic baking technique that adds lightness, texture, and delicious flavor to any dessert. Whipped cream is known for its versatility, allowing for simple and elegant creations or more elaborate and creative ones. Whether for a birthday, wedding, or a casual gathering, whipped cream offers countless possibilities for transforming an ordinary cake into a culinary work of art. In this article, we will explore the best techniques for decorating your cake with whipped cream, from preparation and selection of ingredients to more advanced decorating techniques.
1. Preparation: Choosing the Perfect Whipped Cream
Before you start decorating, it’s essential to choose the right whipped cream for your cake. You can choose homemade or store-bought whipped cream, depending on the level of customization and convenience you want. Homemade whipped cream, made with fresh cream and sugar, provides a more authentic and creamy flavor. To make it, beat the fresh cream with sugar on medium speed until it reaches stiff peaks. Add vanilla extract or other essences to taste for an extra touch of flavor.
Store-bought whipped cream, on the other hand, offers greater stability, which is ideal for decorations that need to last longer or for warmer climates. If you are using store-bought whipped cream, be sure to choose a quality brand to ensure good flavor and consistency.
2. Preparing the Cake: The Ideal Base for Decorating with Chantilly
The foundation for any cake decorating project starts with a well-baked, level cake. Make sure the cake is completely cooled before frosting, as the heat can melt the frosting, ruining the look and texture of the decoration. Use a serrated knife or cake leveler to trim the top to create a flat surface. If desired, drizzle a thin layer of sugar syrup or juice to keep the cake moist and flavorful.
3. Basic Chantilly Decorating Techniques
With the whipped cream prepared and the cake cooled, it’s time to start decorating! Here are some basic techniques to get you started:
- Smooth Cover: The simplest technique is to cover the cake with a smooth layer of whipped cream. Use a pastry spatula or a large knife to spread the whipped cream in smooth, even strokes. For a perfect finish, dip the spatula in hot water and smooth it over the top of the cake.
- Peaks and Ripples: To add texture, use the spatula or spoon to create peaks and waves in the whipped cream. Simply press lightly on the surface of the whipped cream and pull upward to create peaks or use a wave-like motion to create a rustic, natural effect.
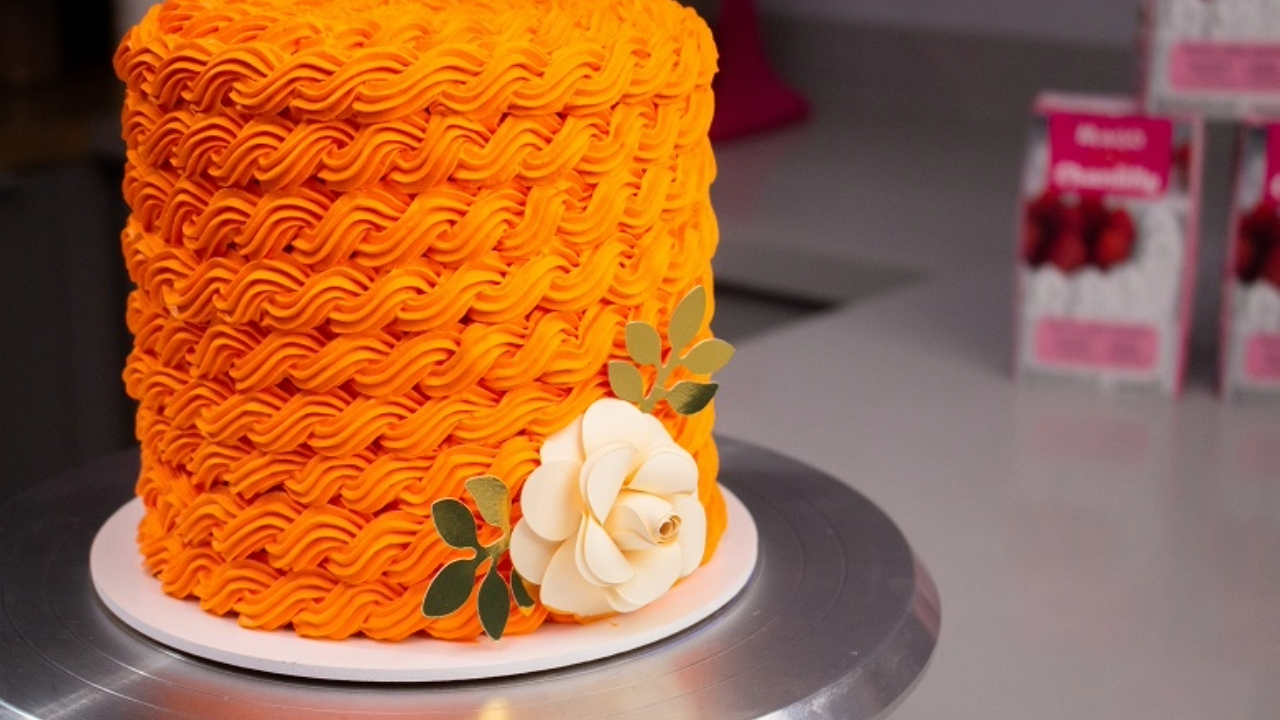
- Chantilly Roses: One of the prettiest techniques is to create whipped cream roses using a star or petal shaped piping tip. Start in the center of the rose and make circular movements in a clockwise direction until you reach the desired size. This technique is ideal for covering the surface of the cake or creating a detail on the side.
4. Advanced Techniques: Customize Your Cake with Whipped Cream
Once you've mastered the basic techniques, it's time to explore more advanced options for decorating your cake with whipped cream:
- Coloring and Flavors: Add color to your whipped cream using food coloring. For a gradient effect, separate the whipped cream into different shades of the same color and apply in layers. Also, try adding flavors like chocolate, coffee, fruit, or aromatic essences for a special touch.
- Marbled Effects: Create a marbled effect by lightly mixing two shades of whipped cream. Place the two shades in a piping bag and use gentle circular motions to apply to the cake. The result is a sophisticated, artistic look.
- Stencils and Airbrush: Use stencils designed for baking to create detailed designs and patterns on the whipped cream. Another interesting technique is to use an airbrush to apply delicate colors or create subtle shading, giving depth and a professional look to the cake.
5. Finishing: Tips and Tricks for a Flawless Finish
For a flawless finish, follow these tips:
- Proper Cooling: After decorating the cake with whipped cream, chill it in the refrigerator for at least an hour before serving. This will help firm up the whipped cream and ensure it holds its shape longer.
- Additional Decoration: Add fresh fruit, chocolate shavings, mint leaves or edible flowers to complement the whipped cream decoration. These extra elements not only beautify the cake, but also add contrasting textures and flavors.
- Storage: If you need to make the cake in advance, keep it refrigerated until ready to serve. Whipped cream is sensitive to heat, so avoid leaving it exposed to high temperatures for too long.
Conclusion: Decorate with Confidence and Creativity
Decorating a cake with whipped cream is a skill that can be honed with practice and creativity. Experiment with different techniques and find the ones that work best for you. Over time, you’ll be able to create cakes that are not only delicious but also visually stunning. Whether it’s for a special occasion or a simple afternoon tea, a cake decorated with whipped cream is always a choice that pleases both the eyes and the palate.